
- 01: Considerations →
- 02: Digging Hole for the Footing →
- 03: Footing Hole Inspection →
- 04: Mixing and Pouring the Concrete →
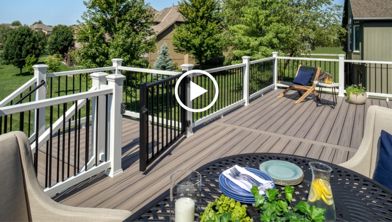
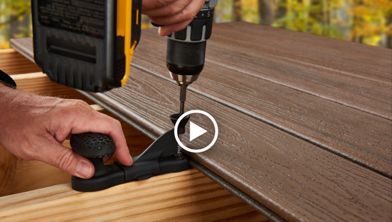
So you're ready to get started? Watch our how-to tutorial before you start your build.
Before you begin any DIY project, make sure to wear the appropriate personal safety equipment. Eye protection, ear protection, gloves, long pants, a long-sleeved shirt, and reinforced toe shoes are recommended. Always make sure that you have a first aid kit nearby. For any home project, be certain to follow local code and permitting requirements.
Step 1: Call 811 or go to www.call811.com
Call 811 or go to www.call811.com before any digging is done on the property. When 811 is dialed, it will automatically be connected to a representative from the state's 811 center who will ask some simple questions about the location and details of the digging project. If a request is made online, the same information will be entered into a form. A representative will then come out and locate the public utilities on the property near where the proposed digging will take place. These utilities include electrical, water, natural gas, communication, and sewer lines. It is required by law to call before digging. If there are private underground utilities, such as propane or a septic system, a private company will need to be called directly to have them locate the underground utilities to their devices.
Step 2: Understand Footing Terminology
- Footing is a term to describe the concrete base in the ground which provides the support for a deck.
- Footing depth will be determined by the frost line in the area. The footing will need to be below the frost line to avoid heaving or sinking of the footing. Check with the local municipality for the depth required by code in the area.
- There are multiple types of footings - from concrete tube pier to concrete footing with a post - so it is important to check with the local municipality for approved types of footings in the area.
Step 3: Determine the Frost Line
- The frost line, also known as frost depth or freezing depth, depends on the climatic conditions of an area.
- Frost lines can vary greatly across the country. They can be shallow in warmer climates and much deeper in colder climates. When digging the hole for footings, the code is to be below the frost line depth in the area to avoid heaving or sinking of the footing.
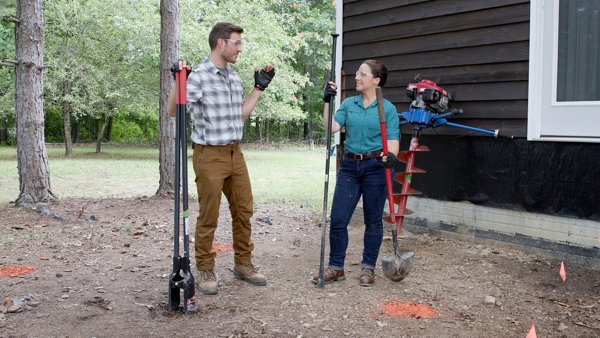
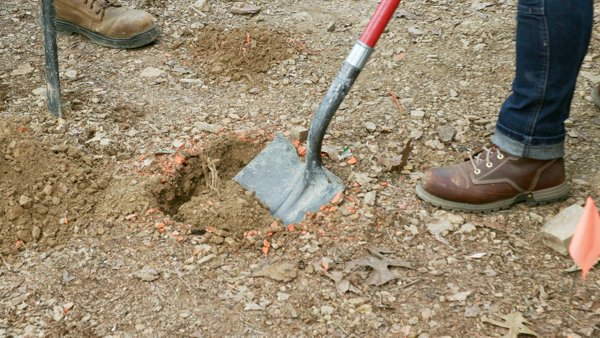
Step 1: Dig Footing Hole By Hand (Option 1)
Once you know the frost line and have called 811, you can begin digging your footing holes. The first option to dig the hole for the footing is by hand. This can be done with a shovel, post hole digger and a digging bar.
Start with the digging bar and loosen the surface of the ground.
Pro Tip
Use the post hole digger to remove the loose soil. If the soil is soft enough the post hole digger can continue to be used without the use of the digging bar.
In this case the soil was hard and had lots of rocks in it, so the digging bar was necessary. Alternate the digging bar and post hole digger to remove the soil to the proper depth.
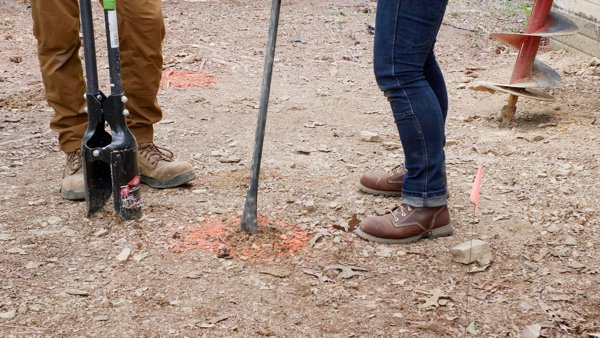
Make sure to dig to the edges of the marks for the hole diameter. The holes need to be to the specifications given on the plans and approved by the local municipality.
A shovel can be used to take out larger amounts of soil. Depending on the depth of the hole, the shovel can only be used towards the top of the hole.
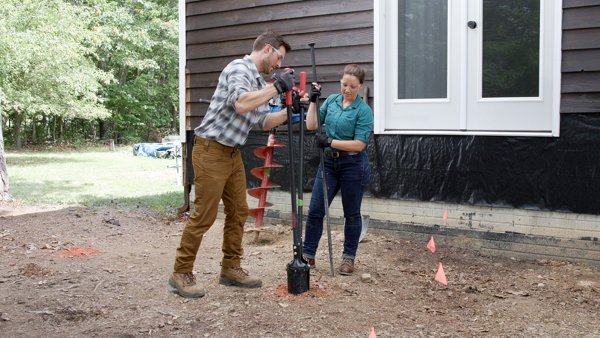
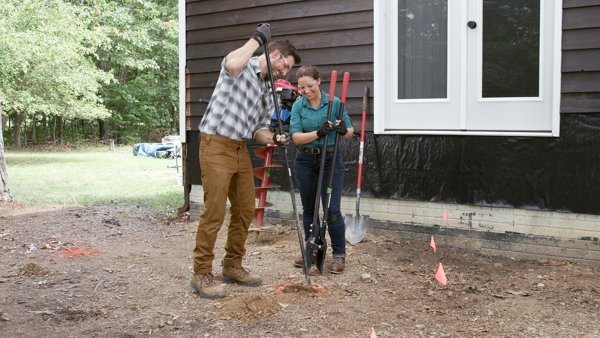
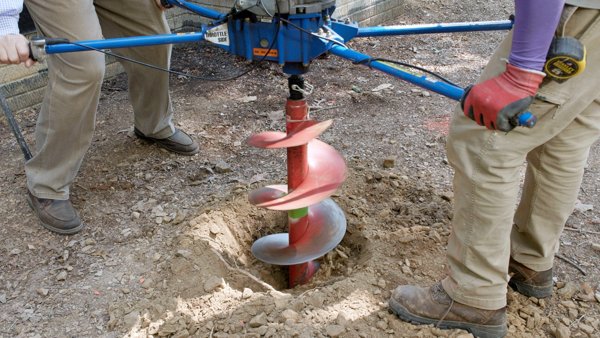
Step 2: Dig Footing Hole with a Power Auger (Option 2)
Another way of digging is with a power auger. These will usually be a 2 person configuration with a motor on top to power the auger that will dig into the ground. The auger size can be specified to the size that is desired. Some common sizes are 6”, 8”, 10” and 12”. These can be found at many hardware and tool rental locations. They may be rented for the half day, day or week.
Pro Tip
These augers can be helpful and quicker in softer soils. In rocky soil or soil with lots of tree roots they are less effective and harder to use. Check the soil type and ask some questions at the rental center for clarification.
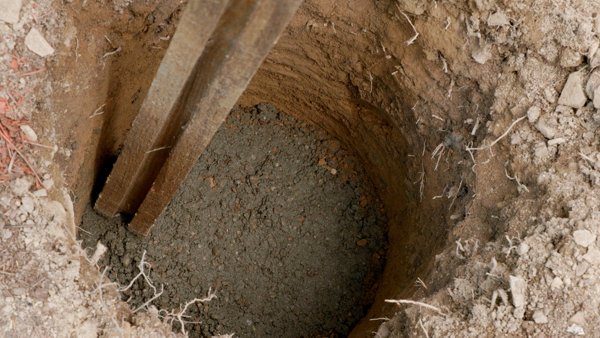
Step 1: Pre-inspection Check
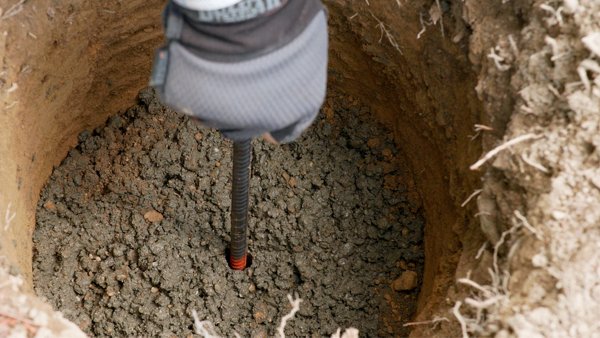
For a permitted decking project, you will need to have an inspector review the footing holes. Before the inspector comes out to inspect the holes, it is a good idea to do a pre-inspection check to verify that the holes meet all the criteria that the inspector will be looking for. Is the hole to the proper depth as stated on the plans? In this case the depth was 24”.
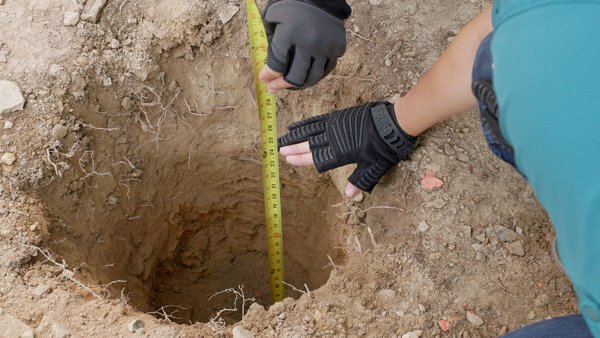
Is the hole the correct diameter? The hole should be a cylinder so the bottom should be the same diameter as the top. In this case the diameter was 12”.
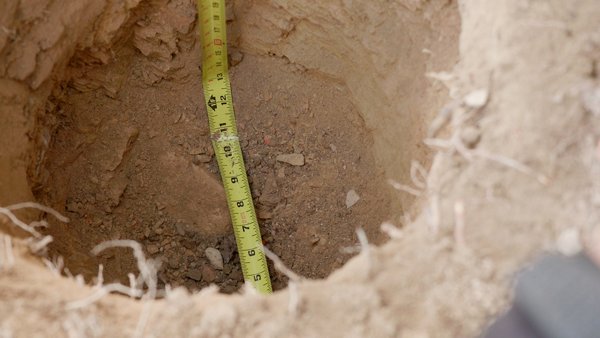
Is there any loose soil in the bottom of the hole? If so, remove the soil so the bottom is a hard surface. Is there any debris in the hole? Debris such as trash, tree roots, pipe or wires should be removed as these items can leave a void if they are left in the concrete. Is there water in the bottom of the hole? This could happen if it rained the night before, a sprinkler was left on and filled the hole, or ground water is seeping into the hole. Remove any water from the hole and let it dry out before the inspection. Make sure the hole is dry before the concrete is poured for the footing.
Step 2: Footing Hole Inspection by Municipality
When all the holes have been verified and are ready for inspection, call the local municipality to schedule the inspection. Municipalities can be different, so be sure to check with the local municipality in the area for time frames of the inspection.
Pro Tip
When the inspector arrives, they will want to see the plans for the project so have those ready.
The inspector will make a visual inspection and check the number of holes that are listed on the plans and make sure that the number of holes on sight are the same as the plans. The inspector will then check the items discussed in the pre-inspection list such as depth, diameter, loose soil, debris, and water in the hole.
If the inspector finds any discrepancies with the holes, they will ask for them to be corrected. If the items are small and can be corrected quickly, they may allow the correction at that time to sign off on the inspection sheet. If the corrections cannot be corrected quickly, or the inspector does not have the time, they will not sign off on the inspection sheet and ask for a reinspection to be called. This can lengthen the time for the building of the project, so it is always a good idea to make sure the holes are to the correct specifications.
Once the holes have been inspected and are approved, the inspector will sign off on the inspection sheet. Now the concrete can be poured for the footings.
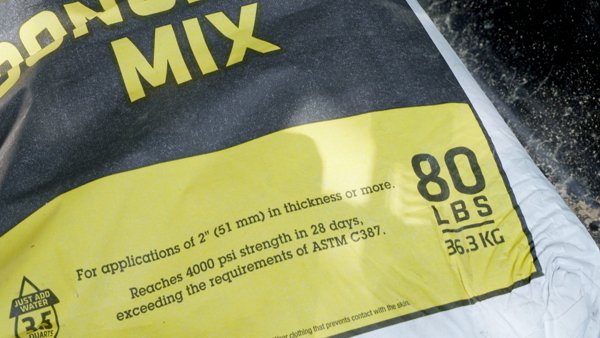
Step 1: Purchase Concrete
When purchasing concrete, look for a mix with a minimum of 3000 psi compression strength and is ready to have water added to it. These mixes will have the concrete, sand and gravel already mixed in the bag. These items can be purchased separately and mixed on site, but a more in-depth knowledge of the ratios would be needed. PSI is pounds per square inch and refers to how much compression strength the concrete has. In this project a 4000-psi concrete was used due to availability and it is higher than the minimum.
Step 2: Mix Your Concrete with a Wheelbarrow (Option 1)
Pro Tip
When mixing concrete make sure to wear personal safety equipment such as, face covering, gloves, long sleeved shirt, eye protection, and ear protection.
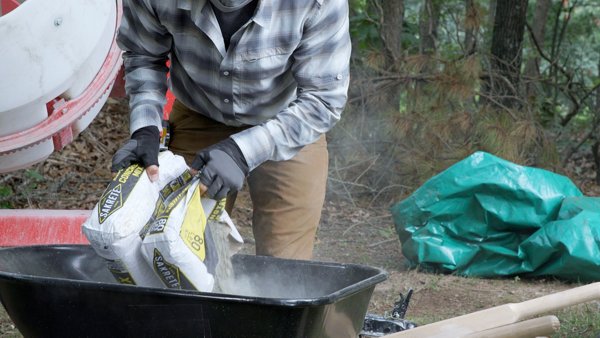
One way to mix the concrete is to use a wheelbarrow and a shovel. This option allows you to mix one bag of concrete at a time, move the wheelbarrow to the hole and pour the concrete directly into the footing hole. This option works well with smaller projects.
Place a concrete bag into the wheelbarrow and, using a shovel, cut the bag in half.

Flip the bag over and fold the bag. Lift the bag out of the wheelbarrow and let the concrete fall into the wheelbarrow.
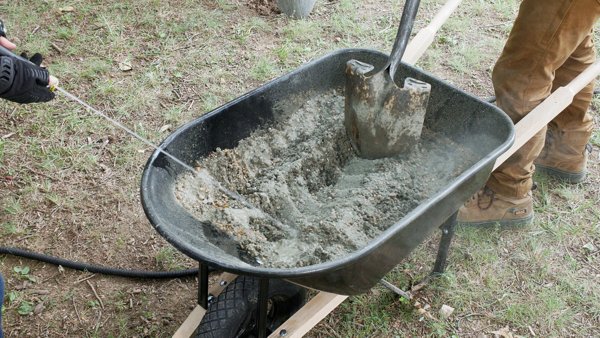
Add water to the concrete and mix thoroughly. The concrete should be wet throughout. Make sure to mix all the concrete and do not leave any dry patches in the concrete. The concrete should look like stiff mud when mixed correctly. Too much water will make the concrete look like murky water instead of stiff mud, and it will weaken the concrete causing it to lose its compressive strength. To avoid this, add the water a little at a time until the mixture is correct. Water can always be added, but it cannot be taken out. If the concrete is mixed with a little too much water, it can take longer for the concrete to set up, which could delay the building process.
Shovel the concrete into the hole. The footing will have to be a specific thickness so use a stick or piece of rebar with a mark on it to help measure. Fill the hole with concrete until it reaches the line or is slightly above it. Remember that the measurement is the minimum, so it can be thicker than that. In this case the footing was required to be 6” thick.
Tamp the concrete with a scrap piece of lumber to level and smooth it out. This will give the support post a smooth and flat surface to sit on.
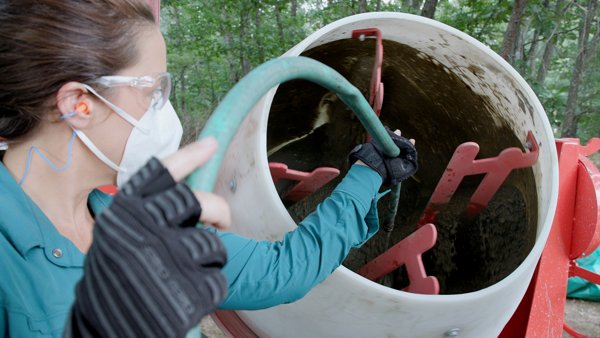
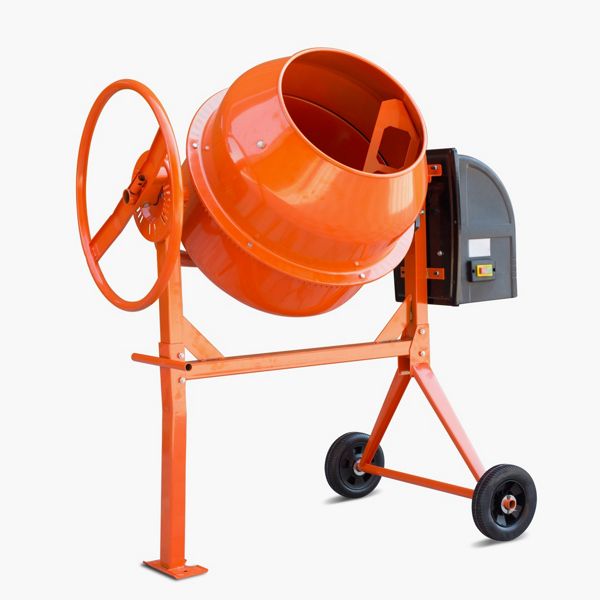
Step 3: Mix Your Concrete with a Concrete Mixer (Option 2)
Another option is to use a concrete mixer, which can mix more bags of concrete at a time making process more efficient.

When using the power mixer, start by adding some water. Pour the concrete into the mixer a bag at a time. Turn the mixer on and let the water and concrete start mixing. Add water a little at a time until the correct consistency is reached.
Once the first bag is mixed thoroughly, add another bag, and repeat the process until the mixture is to the desired consistency. The size of the mixer will determine how many bags of concrete can be added and mixed at one time. Check with the rental location to determine the capacity of the concrete mixer. Once all the concrete has been mixed to the desired consistency, pour the concrete into the wheelbarrow.
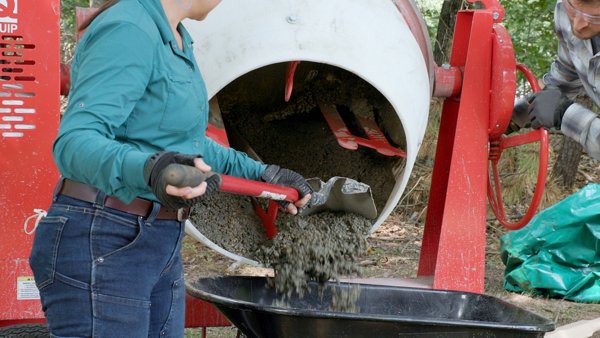
Repeat the process of shoveling the concrete into the hole (outlined in Step 2) and measuring the footing to the proper thickness on all remaining holes.
Step 4: Let the Concrete Set
The climate conditions outside determine how much time will be required for the concrete to set up. In a warm climate the concrete can set up in as little as 24 hours and be ready to build on. In a colder climate the concrete can take longer. Check the hardness of the concrete before building on top of it, and if there is a question about it being ready, then wait another day before building. Keep this in mind when planning the timeline for the project.
Pro Tip
Cover the concrete once it is poured to keep any debris from falling in, speed up the curing process, and avoid anyone falling in the hole.


This content was partially or fully generated by AI and has been reviewed by our team to ensure accuracy and relevance.


Copyright © 2026 Trex Company, Inc. All rights reserved.
Photos and videos © 2026 Warner Bros. Discovery, Inc. or its subsidiaries and affiliates. All trademarks are the property of their respective owners. All rights reserved.
- Country
-
Australia
-
Austria
-
Bahrain
-
Brazil
-
Canada English
-
-
Chile
-
Colombia
-
Costa Rica
-
Cyprus
-
Czech Republic
-
Fiji
-
France
-
Germany
-
India
-
Ireland
-
Israel
-
Kuwait
-
Lithuania
-
Mexico
-
Netherlands
-
New Zealand
-
Norway
-
Oman
-
Qatar
-
Saudi Arabia
-
South Africa
-
Spain
-
Sweden
-
Switzerland
-
Turkey
-
United Arab Emirates
-
United Kingdom
-
United States
-
Venezuela
By choosing your country, you acknowledge that you have read Trex's Privacy Policy