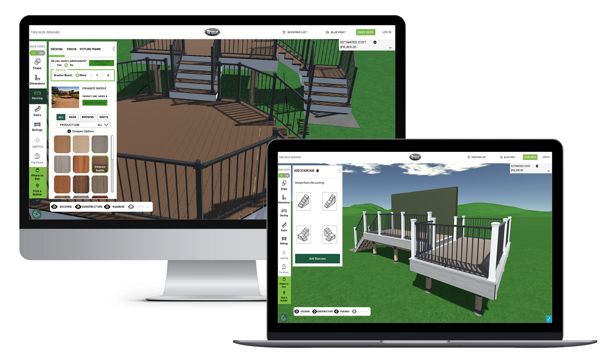
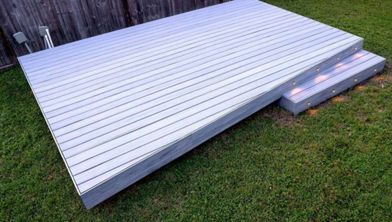
HOW-TO GUIDES

How to Install Trex Select® Aluminum Railing

SHARE

Railing is essential for both the safety and aesthetics of your deck design, but installing this structural element may seem challenging at first glance.

With help from our How-To Team, this guide turns a common challenge into a simple process — whether you're installing posts, panels, or stair aluminum railing.

Instructions provided by Trex® are based on the build specifications that Trex® demonstrated in the Trex® Academy video series and are not universal to all homeowners’ projects. A homeowner’s build may vary from Trex’s instructions based on the homeowner’s local municipality requirements, individual design preference and project specifications. For questions or assistance needed during your project, please reach out to howto@trex.com.

Step-by-Step Instructions
Jump to chapter:
Chapter 01: How to Install a Trex Select® Aluminum Railing Post

Ready to get started? Watch our how-to tutorial before starting your build.

Before you begin any DIY project, make sure to wear the appropriate personal safety equipment. Eye protection, ear protection, gloves, long pants, a long-sleeved shirt, and reinforced toe shoes are recommended. Always make sure that you have a first aid kit nearby. For any home project, be certain to follow local code and permitting requirements.

Step 1

Let's start with installing your braces and blocking. To begin, you'll first need to install a 2x8 cross-bracing frame in between joists at 7-1/4" (18.4 cm). Once your frame is in place, attach using 12 three-inch pressure-treated-compatible screws.

Step 2

Next, you'll install two 2x8 boards as blocking under each location where you plan to install your corner post. Remember to check your railing panels to ensure you're installing each post at the correct interval. Trex Select® Aluminum Railing comes in either six- or eight-foot lengths, so make sure your measurements align with your selected panels.

Securely attach this blocking using a total of 24 three-inch pressure-treated compatible screws. Make sure to use the right number of screws to ensure a secure fit.

Pro Tip

For easier attachment, use two additional screws to "sandwich" blocking boards together.

Step 3

Repeat steps one and two until all post locations have been cross-braced and blocked. Once this is complete, you may install your preferred Trex decking material over your framing.

Step 4

Once your decking has been installed, you can continue installing posts. For corner posts, make sure you are at least 1" in from both inside frame edges. Use your post as a guide and mark the locations of the holes you'll need to drill. Then, set your post aside and drill through both the decking and blocking boards on your marked points with a 5/8" drill bit.

Pro Tip

To help maintain a 90-degree angle, use a speed square as a guide.

Step 5

Once you’ve drilled your holes, align your post with these holes and attach it using four 3/8" by 6" hex cap bolts, washers, and nuts. For IRC compliance, the back plate must be installed under the decking and blocking.

Step 6

Using your level, check if your post is plumb. Check multiple sides to ensure your leveling is accurate.

Step 7

After installing your railing panels, you can add post caps and skirts to each post by snapping skirts into place and tapping the post caps with a rubber mallet.

Now that your posts are in place, you'll have a secure base to build from. Gather your panels and double-check that they align with your posts' clear span. If you have purchased blank railing posts, you will need to add the necessary brackets before starting panel installation.

Step 1

Start by positioning your panel between your posts and check that your end balusters are an equal distance from your posts. Mark your panel with a pencil where it lines up with your post. Leave a minimum of 1.5" on each side of your rails from post to balusters so your brackets can be properly attached.

Step 2

Using a circular saw, cut both the top and bottom of each end of your railing panel 3/8" shorter than where you marked in step two. This will let you properly fit your panel into your post brackets.

Step 3

Once your panel is cut to size, turn it upside down to install the included foot block. Use your tape measure to find the center of your panel, then install your foot block using one #10 x 3/4" screw. Then push the foot block shaft onto the foot block insert. Using a rubber mallet, gently tap the foot block cap into the end of the shaft.

Step 4

Flip your panel right-side up and place it into the bottom and top brackets on your post. Keep in mind that there will be a small gap between your panel and post.

Step 5

Attach your top panel to the top bracket using three #10 x 3/4" screws.

Pro Tip

Set your drill's clutch to a low setting and operate it at slow speeds. Try using a clamp to hold your panel in position on your bracket when installing your first screw.

Step 6

After installing your top-bracket screws, you'll need to install bracket covers. Begin by gently spreading the bracket cover, then snap it into place over the opening on your top and bottom rails. Repeat these steps until all panels have been properly installed.

Step 7

Once you’ve installed your railing panels, you can add post caps and skirts to each of your posts by snapping skirts into place and using a rubber mallet to tap on post caps.

Step 1

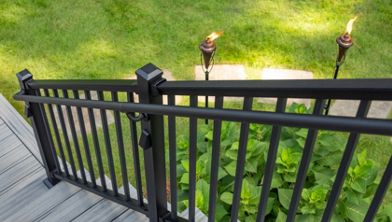
Begin by installing your railing posts using the steps in Chapter One. Then lay a 1" deck board on the stairs between your posts to act as a spacer board. Place your stair panel on top of this board.

Stair panels come perpendicular and will need to be aligned with your post angle by pushing the panel until the balusters are parallel with your posts. Once aligned, check that your balusters are straight and equally spaced, then clamp your panel to your post.

Pro Tip

Once your panel is clamped down, find the center of your panel using your measuring tape and make a small mark for when it's time to install your foot block.

Step 2

Now it's time to attach your swivel brackets. Align your brackets with the top and bottom railing of your panel. To make sure your alignment is correct, make a small mark at the top of your swivel base with a pencil.

Center your bracket on your post below your marked line and attach using four provided #10 x 3/4" self-drilling screws. You may need a 90-degree angle drill adapter to install brackets in tight spaces.

Step 3

After installing the brackets, mark your top and bottom rails where they align with the rear wall of the top and bottom brackets. Unclamp your railing and remove it for cutting. You can unrack your panel and return it to a perpendicular position for cutting. Keep in mind that balusters may come loose.

Step 4

Extend the marks you made in step three to the side of your rails. Cut the ends of your rails 1/16" shorter than your mark on both sides to ensure a proper fit in your swivel brackets.

Step 5

Once your panel is cut to size, flip it over to install your foot block on the underside of your bottom rail. Use one of your provided #10 x 3/4" screws to install your foot block insert to your rail.

Step 6

Flip your panel right-side up and attach it to your swivel brackets using two #10 x 3/4" screws.

Step 7

Place your foot block shaft next to your mounted stair panel in alignment with the foot block insert. Make a mark on your foot block shaft above the mounting hole. Cut your foot block shaft to length, ensuring you have enough clearance for the bottom rail.

Tap the bottom plug into your foot block shaft. Then, install your foot block shaft into your foot block insert using one of the provided #10 x 3/4" screws.

Step 8

After you've installed your foot block and your panel is securely fastened to your brackets, you can then add bracket covers. Gently spread your bracket cover apart, then snap your corresponding bracket covers over the opening in the upper and bottom rails. Repeat steps one through eight for each of your panels.

Step 9

After your railing panels have been installed, you can add post caps and skirts to each post by snapping skirts into place and tapping on the post caps with a rubber mallet.

Tools List

  • Minimum 18 Volt drill
  • 5/8" drill bit for wood 
  • Tape measure 
  • Level 
  • 9/16” inch wrench or socket
  • 3/4" wrench or socket
  • T20 drive bit
  • Pencil
  • Rubber mallet
  • Clamps
  • Circular saw

Materials List

  • Blocking – minimum 2x8 pressure-treated southern yellow pine or equivalent 
  • 3-inch pressure-treated-compatible wood screws – 36 units per post.
  • Trex Select® aluminum post
  • Trex Select® aluminum post hardware
  • Trex Select® aluminum railing panels
  • Trex Select® aluminum railing panel foot block
  • Trex Select® aluminum stair railing panels
  • Stair swivel brackets

The image displays a deck design software interface shown on both a desktop monitor and a laptop. The software features a 3D visualization of a deck with various customization options, including color and material selections. The setting is a digital workspace with green landscape backgrounds and clear UI elements. No people are visible, and the interface includes detailed controls and preview panels.
Design your dream deck before you build it.

From color, railing, and deck shape, our Deck Designer tool* lets you hand pick every element of your new deck. Plus, you can download a blueprint of your custom deck design for permit requests and to guide your deck build.

*only available on desktop

Try the Deck Designer


Unable to Add to Cart

You may order up to 4 free samples. To adjust your selections, remove what you do not need and then add your new choices.