For any home project, be certain to follow local code and permitting requirements.
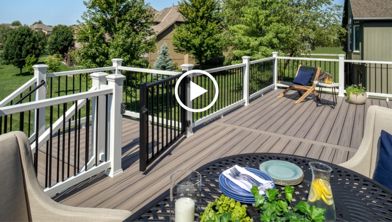
Trex Transcend® railing is our highest-performing composite railing option, giving you a first-in-class design and seemingly endless options - as well as a 25-year performance warranty. With more colors and component profiles than any other railing, Trex Transcend railing provides quality, durability, and requires very little upkeep.
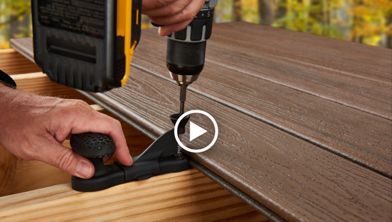
Follow this simple 11-step guide to learn how to install your Trex Transcend horizontal railing and posts.
Step 1: Install Pressure-Treated Posts
When installing posts, review the actual lengths of the railing and set posts accordingly. They should be installed 6’ or 8’ on center to accommodate for appropriate railing length.
Once the appropriate length is confirmed, you’ll use ½” carriage bolts to attach the posts. Keep in mind that the minimum joist size is 2” x 8” and the top bolts must be 1” from the top of the joists with bottom bolts 5-1/8” from the top bolts.
You can also countersink the bolts to be flush with your framing to allow for fascia attachment.
Note: Blocking can be added for extra strength, please verify with your local building code official.
The attachment of the posts to the substructure is one of the most critical parts of a railing system. Ensure all local building codes are understood and followed.
Step 2: Install Post Sleeve Skirts and Post Sleeves
For installing deck railing posts, begin by sliding the post sleeve skirt over the post, all the way down so it rests on the deck surface. Then, slide the post sleeve over the post and position it inside the post sleeve skirt.
Note: Shims can be used to plumb post sleeves.
Step 3: Install Railing Support Brackets
Start by placing your railing support brackets (RSB) in the TrexExpress™ template (included as a part of the post sleeve box). It’s important to place the top RSBs flat-side up and bottom RSBs flat side down. Secure the template on the post with either tape or a rubber band to ensure that the bottom of the template rests on the recently added post skirt.
Once fitted, secure the RSBs with the 2” wood screws that are provided in the railing kit and remove the template. Repeat this step for the other posts.
Step 4: Cutting Railings and Baluster Spacers
Ensure posts are plumb. Snap baluster spacers into rails, and place rails between posts ensuring baluster holes are equally spaced from each post. Cut rails and baluster spacers to the same length. Once cut remove the baluster spacers from the rails.
Tip: If using optional gaskets, subtract 1/16” from each end of the rail before cutting.
Step 5: Prepare Footblock Hole for Bottom Rail
Attaching the footblocks requires you to invert the bottom rail, center and drill a hole using a 3/16” drill bit. This will serve as the location for the footblock attachment, which will be installed last.
Note: One footblock is required for all railing spans.
Step 6: Attach Bottom Rail (Universal Rail)
For this step, lift the bottom rail so the RSBs are in the channel and then attach them with the provided three self-tapping screws using the three outer holes. It’s important you DO NOT use the hole in RSB that is closest to the post.
Note: If a two-hole bracket is included, attach rail with the provided two self-tapping screws.
Tip: Place included gaskets between the rail and post sleeve prior to attaching the rail to the RSB.
Step 7: Attach Top Rail – Crown Rail
When you’re ready to attach the top rail, start by placing the crown rail on the RSBs. Then attach the top rail to the RSB with three self-tapping screws (provided). Like the bottom rail attachment, use the three outer holes -- and NOT the hole in the RSB that is closest to the post.
Note: If two-hole bracket is included, attach rail with the provided two self-tapping screws.
Tip: Place included gaskets between the rail and post sleeve prior to attaching the rail to the RSB.
Step 8: Placement of Baluster Spacers
With the bottom rail attached, snap in lower baluster spacer. Simply place the top spacer on the bottom spacer but invert it (it will slide up the balusters in a subsequent step).
Step 9. Attaching Balusters
Place baluster into both baluster spacers, ensuring that balusters are fully seated into the channel. Working at a slight angle, maneuver balusters into top rail.
Step 10: Secure Balusters
Slide the inverted top baluster spacer up and snap onto the top rail.
Tip: Spray the balusters with soapy water to aid in sliding the baluster spacer for the top rail into place.
Step 11: Attach Post Caps and Install Footblocks
You’re almost finished. The final step is to secure your post caps with silicon or PVC adhesive. When attaching the footblock, make sure to follow the footblock instructions.
Tip: Hold the post caps in place with blue painter's tape to ensure they do not blow off due to strong winds before the silicon or adhesive dries.
Note: Clean up any excess adhesive before it dries.
This content was partially or fully generated by AI and has been reviewed by our team to ensure accuracy and relevance.


Copyright © 2026 Trex Company, Inc. All rights reserved.
Photos and videos © 2026 Warner Bros. Discovery, Inc. or its subsidiaries and affiliates. All trademarks are the property of their respective owners. All rights reserved.
- Country
-
Australia
-
Austria
-
Bahrain
-
Brazil
-
Canada English
-
-
Chile
-
Colombia
-
Costa Rica
-
Cyprus
-
Czech Republic
-
Fiji
-
France
-
Germany
-
India
-
Ireland
-
Israel
-
Kuwait
-
Lithuania
-
Mexico
-
Netherlands
-
New Zealand
-
Norway
-
Oman
-
Qatar
-
Saudi Arabia
-
South Africa
-
Spain
-
Sweden
-
Switzerland
-
Turkey
-
United Arab Emirates
-
United Kingdom
-
United States
-
Venezuela
By choosing your country, you acknowledge that you have read Trex's Privacy Policy