
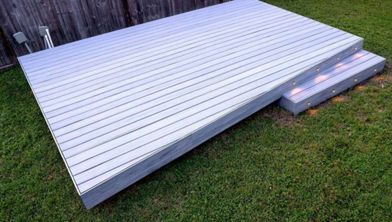
- 01: Replacing Trex Composite Deck Board Fastened with Screws →
- 02: Replace a Composite Deck Board Installed with TREX Hideaway® Clips →
Replacing a Trex composite deck board that’s been fastened with screws is a straightforward task. In most cases, it’s as easy as removing the screws from the damaged board and securing a new one in its place. But even with a simple job, there are a few things to keep in mind that can help the process go more smoothly. Here are some tips to make a simple job even easier.

Step: 1 Remove the Old Screws
If the board is held down with Trex Hideaway® Plugs & Screws, you’ll need to remove the plugs first. One simple way of removing the plugs is to use a sharp screw and drive it into the plug. When the screw comes in contact with the head of the deck screw below, the plug will be lifted right out. Drive the plug-removal-screw in gently to avoid damaging the deck screw. If you accidentally strip out the heads of a couple deck screws while trying to remove them, you can simply pry up the board.
Use a scrap piece of wood under hammer claws and pry bars when using adjacent boards as leverage. Sometimes the screw will come out with the joist, but more often it stays in the joist while the board pulls free around it. To remove screws still lodged in the joist, you can turn them out with a locking pliers, cut them off with a saw, or bust them off with a hammer.
Step 2: Install the New Board
Cover the existing screw holes with a dab of waterproof sealant or Trex® Protect Joist Tape and position the new board in place. Use shims, scraps of wood, or some other type of spacers to make sure the gaps on either side of the new board are consistent and the same as the others.
Step 3: Install the New Screws
Install the new screws (and plugs if required) the same way you installed them originally. Check out this manual for more information on proper screw placement and required expansion gaps. You may want to use longer screws than the ones you pulled out in case you hit the same hole, and the screw strips out the wood. If a longer screw isn’t an option and you do strip out a hole, you can insert a sliver of pressure treated wood into the hole before trying again. A small section of solid copper wire (12-14-gauge) also works well and won’t deteriorate over the years.
Replacing a Trex deck board installed with hidden fasteners takes a bit more finesse than removing one that is held down with screws, but it’s still a straightforward process, especially if you have easy access to one end of the deck board. If the border board or fascia/skirt board is easily removable, start by taking that off to get access to the end of the board.
Then: Loosen the screws holding the clips in place; slide the clips out; remove and replace the board; slide the clips back into position; and fasten them down. However, more often than not, border and fascia/skirt boards are pinned in place by railing components and aren’t easily removed. The following steps will walk you through how to handle this common scenario.

Step 1: Loosen the Clips Holding the Old Board In Place
Loosen all the TREX Hideaway® Clips along both sides of the board that needs to be replaced. Loosen the screws far enough so that the clips can slide freely back and forth within the groove, but not so far that they separate from the clips.

Step 2: Loosen the Screws on Adjacent Boards
Loosen all the clip screws on the far side of the boards on either side of the damaged deck boards. On one end, the first three clips on each adjacent boards need to slide freely (more on this below), but all the others just need to be loosened a little bit. Loosening these clips will allow each adjacent boards to tilt up slightly as you pull the old board out.

Step 3: Remove the Old Board
You can now pry out the damage board and remove it. Measure the damaged board or use it as a template to mark the size of the new one. Read this article for more information about cutting composite decking.

Step 4: Seal the Screw Holes
Apply a weatherproof sealant or Trex Protect Joist Tape over any exposed screw holes. This helps protect the framing by preventing water from pooling in the old screw hole. Even if the screw lands exactly in the original hole when reinstalled, sealing the area will reduce the chance of water running along the sides of the screw and seeping into the joist, potentially adding years to the life of the joist.

Step 5: Install the New Board
Remove all the clips from one of the adjacent boards. On the other adjacent board, make sure all the clips are in place over every stud. Now, slide the new board into those clips.

Step 6: Slide in the Missing Clips
In order to slide in the missing hidden fastener clips, you’ll have to lift the new board as well as the adjacent board (the one with no clips) up higher than the boarder/skirt board. In order to accomplish this, you’ll need to take the first three or so clips on the far side of each adjacent board and slide them back away from the boarder/skirt board. Next, use a narrow pry bar or putty knife to lift up the new board along with the adjacent board so you can slide in the hidden fastener clips. You may need to use a spacer or tool of some kind to keep the new board in place and separated far enough so the clips slide in freely.

Step 7: Position and Fasten the Clips
All that’s left is to position all the hidden fastener clips and secure them to the joists. Be sure each clip is tight and seated properly for a secure and even finish.
Consider Hiring a Trex Pro® Builder
If you don’t have the time or inclination to tackle a repair like this yourself, contacting a TrexPro® builder will ensure that you hire someone who’s familiar with the full range of Trex products and can easily handle a project like this.
Learn more about building Composite Decks
Want to take your deck-building skills even further? From lighting upgrades to full resurfacing guides, these how-to articles and videos will walk you through additional projects step by step. Dive in and learn how to build a better deck with confidence.
Gather the Right Tools and Materials
Save yourself a lot of time by making sure you’ve got the right tools and materials on hand before you get started. This checklist will help you stay safe, organized and prepared from start to finish.
Tools
- Pliers
- Thin Pry Bar or Putty Knife
- Pencil or Marker
- Plug Hole Cutter
- Safety Glasses
- Work Gloves
- Hearing Protection
- Dust Mask
- Knee Pads
Materials

This content was partially or fully generated by AI and has been reviewed by our team to ensure accuracy and relevance.


Copyright © 2026 Trex Company, Inc. All rights reserved.
Photos and videos © 2026 Warner Bros. Discovery, Inc. or its subsidiaries and affiliates. All trademarks are the property of their respective owners. All rights reserved.
- Country
-
Australia
-
Austria
-
Bahrain
-
Brazil
-
Canada English
-
-
Chile
-
Colombia
-
Costa Rica
-
Cyprus
-
Czech Republic
-
Fiji
-
France
-
Germany
-
India
-
Ireland
-
Israel
-
Kuwait
-
 Lithuania
-
Mexico
-
Netherlands
-
New Zealand
-
Norway
-
Oman
-
Qatar
-
Saudi Arabia
-
South Africa
-
Spain
-
Sweden
-
Switzerland
-
Turkey
-
United Arab Emirates
-
United Kingdom
-
United States
-
Venezuela
By choosing your country, you acknowledge that you have read Trex's Privacy Policy