
 4-10 Hours with a Team of Two*
- 01: Clean Up and Site Preparation →
- 02: Laying Out the Deck Perimeter →
- 03: Laying Out the Beams and Posts →
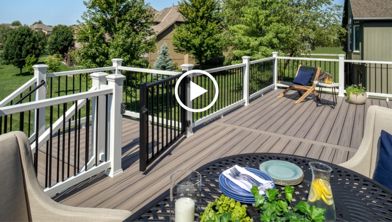
So you're ready to get started? Watch our how-to tutorial before you start your build.
Before you begin any DIY project, make sure to wear the appropriate personal safety equipment. Eye protection, ear protection, gloves, long pants, a long-sleeved shirt, and reinforced toe shoes are recommended. Always make sure that you have a first aid kit nearby. For any home project, be certain to follow local code and permitting requirements.
Step 1: Remove Debris from Worksite
Clean the area where you will be building. Rake the ground removing all debris and rocks.

Step 2: Inspect Grade
The grade should slope away from the house. This means that the soil should be highest at the house and slope downs as it gets farther away from the house. This ensures that water will run away from the foundation when it rains. Fill any holes that are close to the house so that water will not build up next to the foundation.
Step 3: Call 811
Before any digging is done, call 811.

Call 811 or go to www.call811.com before any digging is done on the property. When 811 is dialed, it will automatically be connected to a representative from the state's 811 center who will ask some simple questions about the location and details of the digging project. If a request is made online, the same information will be entered into a form. A representative will then come out and locate the public utilities on the property near where the proposed digging will take place.
These utilities include electrical, water, natural gas, communication, and sewer lines. It is required by law to call before digging. If there are private underground utilities, such as propane or a septic system, a private company will need to be called directly to have them locate the underground utilities to their devices.
Step 1: Mark the Perimeter of the Deck
Mark the perimeter of the deck first. Start by measuring and marking where the edge of the deck will go on the house. Make sure to take into consideration where the frame goes and what might be added to the frame. Fascia, handrail, and stairs are some examples of what could be added to the outside edge of the frame. Check the plans to determine these extras and mark where the frame will be.

Step 2: Mark the Edge of the Deck Frame
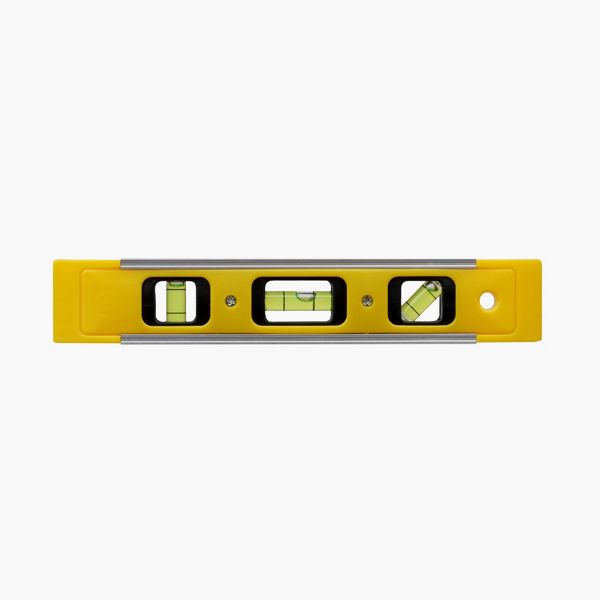
Using a level, plumb down from the mark that was made on the house. Mark against the house near the ground. This will show where the edge of the deck frame is on the ground. If the project is higher off the ground, a plumb bob with a string can be used. Hold the string against the mark and let the plumb bob hang near the ground. Mark the ground where the plumb bob is pointed.

Drive a stake into the ground at the mark made against the house.

Step 3: Create a String Outline for Your Deck Frame
Measure out from the house 1’ longer than the length of the deck. In this case, the deck is 14’ so 15’ was measured and marked on the ground. This line will be going the entire width of the deck. Side strings will be attached to this line. When these side strings are attached, they will pull against that front string. This will give flexibility in moving the side strings side to side to determine right angles. The actual front line of the deck will be installed later for a visual perspective.

Measure over approximately 1’ to the outside edge of the deck. Try to be as close to 90 degrees off the house so the edge of the deck can be visualized. The 1’ past accounts for the line not being exactly 90 degrees off the house. It can be more than 1’ but at least 1’ minimum. This makes the outside string line versatile to move side to side and be squared up with the house. Meaning the side strings will be at a 90-degree angle to the house.

Put the stake into the ground at this location.

Repeat this process on the other side of the deck. Tie a string from stake to stake and pull it tight.

Step 4: Add Slide Strings to Your String Outline for Your Deck Frame
Tie the side string to the front string and pull it tight to the stake placed at the house. When tying this string to the front make sure it is a loop so it can move side to side.

Pull the string tight and tie it off at the stake near the house.

Step 5: Use the 3, 4, 5 Method (Ideal for Smaller Decks)
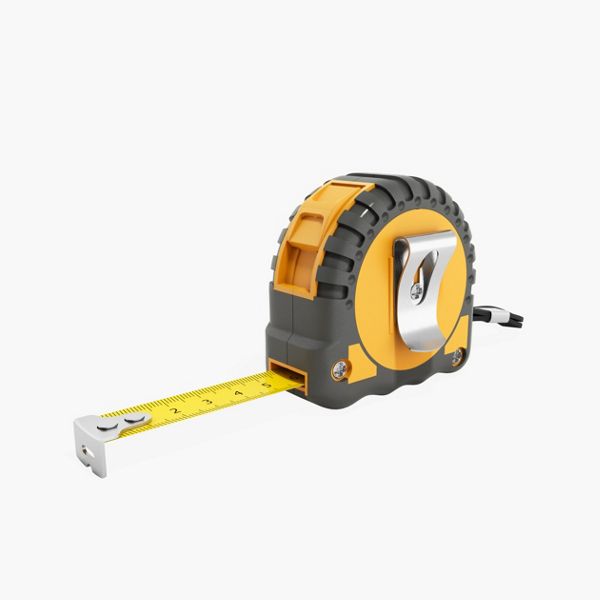
Using the 3, 4, 5 method, we can determine a 90-degree angle off of the house where the edge of the deck will be. To use this method, measure 3 feet from the edge of the house, 4 feet away from the house and the measurement diagonally should be 5 feet. In this instance, a line will be used to measure 4 feet. Move the line on the 4 foot side in or out to line up with the 5 foot mark. Once the diagonal is at 5 feet there is a 90-degree angle at the house and the deck will be square with the face of the house.
Step 6: Use the 6, 8, 10 Method (Ideal for Larger Decks)
In this instance, a variance of the 3, 4, 5 was used. Double the numbers and it becomes the 6, 8, 10 method. This gives longer lines to be more accurate on larger decks. Measure 6’ from the edge of the stake that represents the end of the deck frame and mark the house.

Measure 8’ out from the house and mark the string line that represents the outside edge of the deck frame.

Measure the diagonal between the 6’ marked against the house and the 8’ marked away from the house. This should now measure 10’. Make sure to use the same side of the tape measure on each mark.

If the diagonal does not measure 10’ then the string line that represents the outside edge of the frame will need to be moved. Move it one way or the other until the diagonal measures 10. This may take a couple of movements to get it to the exact measurement. Make small moves and check the measurement often.

Once this is measured correctly then the side of the deck frame is laid out at a 90-degree angle to the house.

Repeat this process on the opposite side of the house where the deck will end. With this side completed the beams can be measured and staked.

Step 1: Mark Your Beam Placement
Measure from the house along the string line representing the outer edge of the deck. The measurement will be notated on the plans for the beam location. Mark this measurement on the string line.

Place a stake in the ground at this mark just outside the string line.

In the case of multiple beams, mark all beams on the one side.

Install stakes at these marked locations.

Measure and mark the beam locations on the opposite side of the house.

Attach a string line to the stakes. This will indicate where the beams will be located. Make sure to pull the string line tight so that it does not sag.

Step 2: Mark the Post Locations
Follow the dimensions on the plan and locate the first post from the edge of the deck frame. Sometimes this post will be on the very edge of the deck frame and sometimes it will be inside the edge of the deck frame. In this case, the post was located 1’ in from the edge of the deck frame. Remember to mark the center of the post location and not the edge of the post. In this case, the post is a 6x6 measuring 5 ½” wide. Measure 12” + 2 ¾” to find the center of the post.

The measurements for the post locations will be notated on the plans. Measure from the first post location on the string line to the second post location. Remember that the measurements are from the center of post to center of post. Mark this location on the string line.

Continue this process for all post locations. In the instance where there is an obstacle close to the post location, make sure the post location is far enough away from any obstacles to ensure that the footing does not hit the obstacle. In this case, the utility was more than 2’ away from the post location. Check with the local municipality for these distances.

At each location that was marked on the string line of the beam, use an upside-down marking paint to spray the ground. Spray straight down to the ground at each mark. This is the center of the footing location.

Step 3: Mark the Diameter of the Footing Hole
Mark the diameter of the hole to be dug. This diameter will be located on the plans. This size was determined when the deck was designed and needs to be dug correctly as the inspector will measure the holes at the time of the footing inspection. A tape measure can be used to measure the diameter or, if the size of the hole can be matched up with a forming tube, the forming tube can be used. In this case, the hole needed a diameter of 12” and the forming tube matched that size. Spray the hole size desired on the ground.

Repeat this process at all post locations. Now the hole locations have all been marked and are ready to dig.


Deck Framing Overview
Careful planning and layout are essential for building a strong, long-lasting deck frame. The following overview walks through the major steps involved in framing a deck, from the initial layout through installing the joists and stairs.
What You Need to Know About Deck Framing Before You Build
Make sure the design accounts for the finished deck as well as the structure needed to support it. Decisions about the decking, railing, stairs and other features can affect everything from joist spacing to the location of posts and footings.
- Permits and approvals: Determine which permits and approvals are required before finalizing your deck plans or purchasing materials. Local building codes, setback requirements, easements and HOA rules can all affect where and how you build your deck.
- Required skills: Building a deck requires basic carpentry skills and the tools needed to measure, cut and fasten wood and composite framing components. You’ll also need to be able to lift and maneuver heavy framing materials, such as beams and joists, as well as bags of concrete. And when installing a ledger board, you will also need to understand flashing and water management.
- Parts of a deck frame: Familiarize yourself with various parts of a deck, including footings, posts, beams, the ledger board, joists, rim joists, blocking and structural hardware. Understanding how these components work together will make the construction process easier to follow.
- Deck size: The dimensions of the deck affect the size and spacing of joists, beams, posts and footings. Larger spans may require larger framing members, additional beams or more support posts.
- Expected loads: Consider anything that could add significant weight to the deck, including heavy snow, hot tubs and built-in outdoor kitchens. These loads may require additional or larger structural components and should be accounted for in your deck frame design.
- Type of beams: Decide whether the deck will use a drop beam, where the joists sit on top of the beam, or a flush beam, where the joists are attached to the side of the beam with joist hangers. The choice can affect the deck height, post height and overall framing layout.
- Decking type and layout: Choose your decking and determine the board direction and pattern before designing the frame. Diagonal decking, picture framing and other layouts may require closer joist spacing or additional blocking.
- Railing system: Know which railing system you plan to install before framing the deck. Railing posts and other components may require additional blocking or specific framing configurations for proper alignment and attachment.
- Stair locations: Determine the stair locations and approximate dimensions during the planning stage. Stairs can require additional framing, headers, posts and footings that should be incorporated into the deck frame from the beginning.
- Existing house framing: For an attached deck, determine how the house is framed and whether it provides a suitable location for attaching the ledger board. Proper ledger attachment and flashing are critical for creating a strong connection while protecting the house from water intrusion.
Step 1: Design Your Deck
The first step to a deck build is thinking about how the finished deck will look, function and fit your home and property.
- Location: When deciding where to locate the deck, beyond required easement and property line setbacks, consider sun exposure, prevailing winds, views, privacy and the deck’s impact on existing landscaping.
- Size: Determine how you plan to use the deck and how much space those activities will require. Lay out the furniture, grill and other features you expect to use in an empty space to help determine how much room will be required for people to move around comfortably.
- Height: Consider how the deck height will affect access from the house, stairs and railing requirements. When possible, keep the decking surface a few inches below exterior door sills to help reduce the risk of water reaching the sill and causing rot or other moisture damage.
- Materials: Compare and choose decking and railing materials based on appearance, durability, maintenance requirements and warranty coverage.
- Colors: Decide whether you want the decking and railing colors to match the home, complement its existing colors or create a contrasting design statement.
Trex’s deck design tool can help you experiment with deck sizes, layouts, materials and colors before you begin laying out the frame.
Step 2: Lay Out Your Deck Location
Establish a square footprint and mark the locations of the footings as described in Chapters 1 through 3 of this article.
Step 3: Install the Footings
Properly sized and located footings provide a solid foundation for the deck and transfer its loads to the ground. Here are the basic steps:
- Determine the size and depth: Determine the required footing diameter and depth based on the deck design, local building codes and frost depth.
- Call 811: Contact 811 before digging to have underground utilities located and marked. Keep in mind 811 contractors will not locate private underground utilities, such as lines running to a shed or other obstacles like irrigation lines.
- Mark the locations: Use your deck layout to accurately mark the center of each footing.
- Dig the holes: Dig each footing hole to the required diameter and depth.
- Schedule the inspection: If required, have the footing holes inspected before pouring concrete.
- Pour the concrete: Insert concrete form tubes (if used) and fill the footing holes with concrete.
- Install the post anchors: Set wet-set post anchors in the fresh concrete or install anchors with approved fasteners after the concrete has cured, depending on the type of post base being used.
Check out this article for a complete guide on how to install footings.
Step 4: Install the Ledger Board
For an attached deck, the ledger board connects the deck frame to the house and supports one end of the joists. Proper attachment and water management are critical to creating a strong connection and preventing moisture from entering the house.
- Determine the ledger location: Establish the correct height and position based on the finished deck elevation and framing plan.
- Prepare the house: Remove siding or other exterior materials as needed to expose the structural framing, then install back flashing to help protect the house framing from water intrusion.
- Install the ledger: Position the ledger, make sure it's level and fasten it to the house framing with approved structural fasteners.
- Flash the connection: Install flashing and other water-management components to direct water away from the ledger and house framing.
For detailed instructions, see our deck framing guide on how to install a deck ledger board and attach flashing.
Step 5: Install the Posts and Beams
The posts and beams support the deck frame and transfer its weight to the footings. Careful positioning and installation help ensure the deck is level and properly supported.
- Position the posts: Place the posts at their footing locations, plumb them and temporarily brace them.
- Determine the beam height: Use the ledger and deck plans to establish the beam elevation and transfer it to each post.
- Mark and cut the posts: Mark the posts for the selected post-to-beam connection, then cut and notch them as required.
- Install the beams: Measure, cut and assemble the beams, then position them on the posts and secure them with the specified connectors and fasteners.
- Brace the framing: Check that the structure is square and install any required bracing to help stabilize the structure.
For detailed instructions, see our guide on how to install deck frame beams and posts.
Step 6: Install the Joists
Joists span between the ledger and the beam, or between beams, to support the decking and distribute its weight across the deck frame. Proper spacing and installation are important for creating a strong, flat surface for the decking.
- Lay out the joists: Mark the joist locations on the ledger and beams according to the spacing specified in the framing plan.
- Install the rim joists: Position and fasten the rim joists to establish the outer edges of the deck frame.
- Cut the joists: Measure and cut the joists to length.
- Install the joists: Position the joists on the layout marks and secure them with joist hangers, structural fasteners, or other approved connectors as required.
- Install blocking: Add blocking between joists where required for stability, railing posts, decking patterns, or other features.
- Protect the framing: Apply joist and beam tape to the tops of the framing members to help protect the wood from moisture before installing the decking.
Step 7: Build the Stairs
Deck stairs require careful layout and framing to provide safe, comfortable access between the deck and the ground.
- Determine the stair location: Confirm where the stairs will land and make sure there is adequate space for the entire stair run.
- Calculate the rise and run: Measure the total rise and determine the number and dimensions of the risers and treads.
- Lay out and cut the stringers: Mark the rise and run on the stringers, cut them to shape and use the first stringer as a template for the others.
- Prepare the landing: Install the required landing, footing, or other support at the bottom of the stairs.
- Install the stringers: Secure the stringers to the deck framing and landing using approved connectors and fasteners.
- Install the treads: Attach the stair treads according to the decking manufacturer’s requirements.
Check out this video and article to learn more about building stairs.
Important Pro Tips for Framing Your Deck
Understanding how to frame a deck involves more than simply assembling the structural components. A little planning and a few thoughtful deck framing techniques can speed up your project, improve safety and help prevent problems that are difficult to correct once the decking is installed.
- Plan for future upgrades: If you might add a hot tub, lighting or an outdoor kitchen with plumbing, electricity or gas appliances, plan for the additional loads and utility access.
- Design around material sizes: When possible, size the deck around standard material lengths to reduce waste, cuts and seams. Trex decking is available in 8-, 12-, 16- and 20-foot lengths, depending on the product, while Trex railing sections commonly come in 6- and 8-foot lengths.
- Use joist tape: Joist and beam tape is relatively inexpensive insurance against moisture that collects on top of the framing, where it can penetrate the wood and cause rot.
- Use the proper materials: Use pressure-treated lumber rated for its intended exposure, including ground-contact-rated lumber where required. Also, fasteners, connectors and other hardware should be approved for use with pressure-treated lumber.
- Crown your lumber: Install joists and beams with the crowns facing up to help create a flatter deck surface. Avoid using severely bowed, twisted, or otherwise distorted lumber.
- Confirm as you go: Periodically check that the frame remains square and level as you install beams, joists and rim joists.
- Cut joists to a line: Some pros run joists long, snap a chalk line and cut them in place. This creates a straight line for the rim joist even when the house or ledger is uneven.
- Keep clamps handy: Hand clamps are useful for temporarily holding framing components in position while you measure, adjust, or fasten them, especially when working alone.
- Wear appropriate PPE: Always wear eye and hearing protection, along with other appropriate personal protective equipment, when cutting, drilling and fastening framing materials.







This content was partially or fully generated by AI and has been reviewed by our team to ensure accuracy and relevance.


Copyright © 2026 Trex Company, Inc. All rights reserved.
Photos and videos © 2026 Warner Bros. Discovery, Inc. or its subsidiaries and affiliates. All trademarks are the property of their respective owners. All rights reserved.
- Country
-
Australia
-
Austria
-
Bahrain
-
Brazil
-
Canada English
-
-
Chile
-
Colombia
-
Costa Rica
-
Cyprus
-
Czech Republic
-
Fiji
-
France
-
Germany
-
India
-
Ireland
-
Israel
-
Kuwait
-
Lithuania
-
Mexico
-
Netherlands
-
New Zealand
-
Norway
-
Oman
-
Qatar
-
Saudi Arabia
-
South Africa
-
Spain
-
Sweden
-
Switzerland
-
Turkey
-
United Arab Emirates
-
United Kingdom
-
United States
-
Venezuela
By choosing your country, you acknowledge that you have read Trex's Privacy Policy


